
After a loud bang from the garage or a door that only lifts a few inches before stopping, many homeowners start looking into garage door spring repair. The first question is usually simple: which replacement spring does the door need?
Before ordering a new spring or speaking with a repair technician, identify the garage door spring measurements that define the existing spring . Garage door springs do not match by appearance alone. The wire diameter, inside diameter, and coil length determine which spring will properly balance the door.
This guide explains how to size a garage door spring step by step, just like a technician would. It covers what to measure, which numbers matter, and when it is safe to identify a spring yourself versus when it is better to call a professional.
Grab a tape measure and let’s decode that spring!
Why Correct Spring Sizing Actually Matters
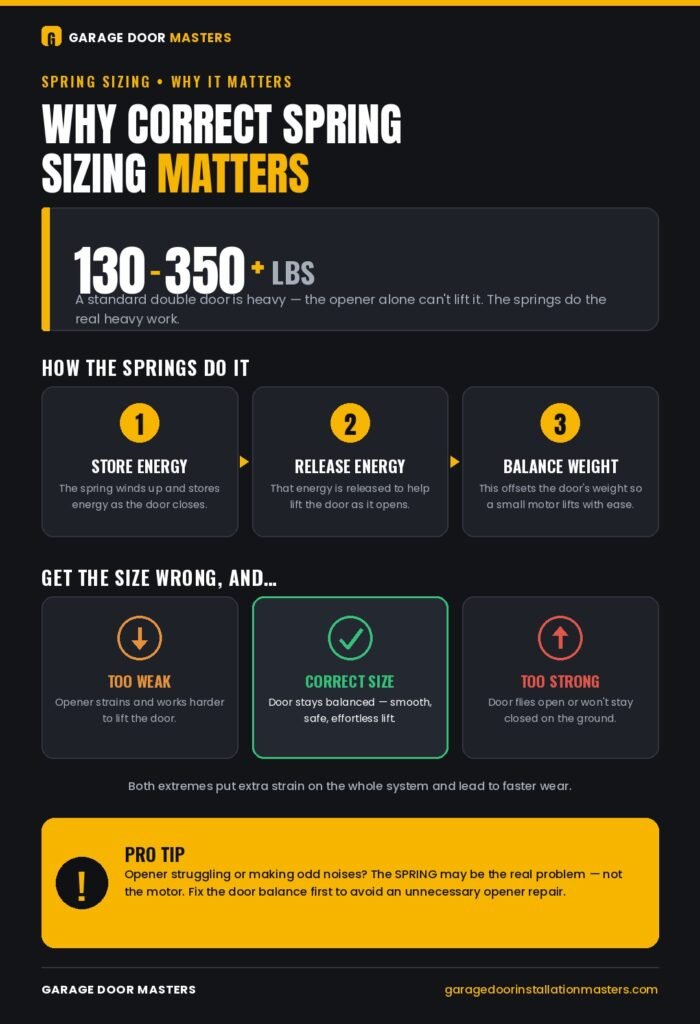
A garage door is heavy, but the springs make it possible to lift with ease. A standard double door can weigh 130 to over 350 pounds, and the opener alone is not designed to handle all that weight.
They store energy when the door closes and release it when the door opens. This stored energy helps balance the door’s weight, allowing a small motor or even a person to lift a heavy garage door more easily.
A spring that is too weak makes the opener work harder, while a spring that is too strong can cause the door to open too quickly or fail to stay closed. Both problems put extra strain on the garage door system and lead to faster wear.
If the opener is struggling or making unusual noises, the spring may be the real problem — not the motor. Fixing the door balance first can help avoid an unnecessary garage door opener repair.
Step 1: Determine Which Type of Garage Door Spring You Have
Before measuring anything, take a quick look at the spring setup above the garage door. Garage doors usually use one of two spring types, and the measurements you need depend on which one you have.
Torsion springs sit on a metal shaft above the door opening, usually with cable drums on both ends. They work by twisting and releasing energy to help lift the door.
Extension springs sit along the horizontal tracks near the ceiling, one on each side of the door. They stretch and contract as the door opens and closes.
A quick way to tell: look above your garage door. If the springs are wrapped around a metal shaft above the opening, you have a torsion spring. If the springs stretch along the horizontal tracks near the ceiling, you have an extension spring.
Got it? Good. Now jump to the section that matches your setup.
How to Size a Garage Door Spring: Torsion Spring Measurements
A torsion spring is defined by four numbers: wind direction, wire size, inside diameter, and length. Let’s take them in order.
1. Wind Direction (Read the Cone Colors)
Every torsion spring is wound in a specific direction, and it must be installed on the correct side of the door. You cannot simply flip a spring around to make it work on the other side.
The easiest way to check the wind direction is by looking at the winding cone — the fitting on the end of the spring. Many torsion springs use color-coded cones to show the wind direction:
- Red cone: This means the spring is right-wound and installs on the left side of the door (when viewed from inside the garage).
- Black cone: This means the spring is left-wound and installs on the right side.
This can feel backwards at first: right-wound goes on the left, and left-wound goes on the right. Write down what you find so you do not have to remember it later.
If the cone color is missing or faded, you can identify the wind direction by looking at the angle of the last coil.
2. Wire Size (The 10-Coil Method)
Torsion spring wire size is one of the most important measurements because it determines the strength of the spring. The easiest way to measure it is by counting coils instead of measuring the thickness of one small section.
Here’s how to do it:
- Push the coils tightly together if there are any gaps.
- Measure across 10 coils with a tape measure or ruler.
- Record the measurement to the nearest 1/16 inch.
- Divide that number by 10 to find the wire diameter.
- Measure 20 coils as a second check if possible.
For example, if 10 coils measure 2 inches, the wire size is 0.200 inches.
After finding the wire size, garage door spring size chart to confirm the correct specification.
3. Inside Diameter (Check the Cone Stamp First)
The inside diameter (ID) is the size of the hole in the middle of the spring where the torsion shaft runs through. Most residential torsion springs use a 1-3/4″ or 2″ inside diameter.
Before measuring, check the winding cone or the stationary cone for a stamped number. The spring size is often stamped on the cone:
- 175 = 1-3/4″ inside diameter
- 200 = 2″ inside diameter
- 225 = 2-1/4″ inside diameter
If you find the stamp, use that measurement. If there is no marking, measure the inside opening of the spring and match it to the closest standard size.
4. Length (Measure the Coils, Not the Cones)
The last measurement is the spring’s length — measure only the coiled section, not the metal cones on the ends.If the spring is broken, bring the two broken pieces together and measure the full coil length from end to end.
In case, if spring is still intact, measure the coil length as it sits. Do not try to unwind, adjust, or remove tension from the spring while measuring.
Round the measurement to the nearest inch. Common residential spring lengths range from about 20 inches to over 35 inches, depending on the door size and weight.
A Note on Two-Spring Doors
If your garage door has two torsion springs, measure both. They may not always have the same specifications, and having the correct measurements for each spring helps ensure the replacement matches your door setup.
How to Size an Extension Spring
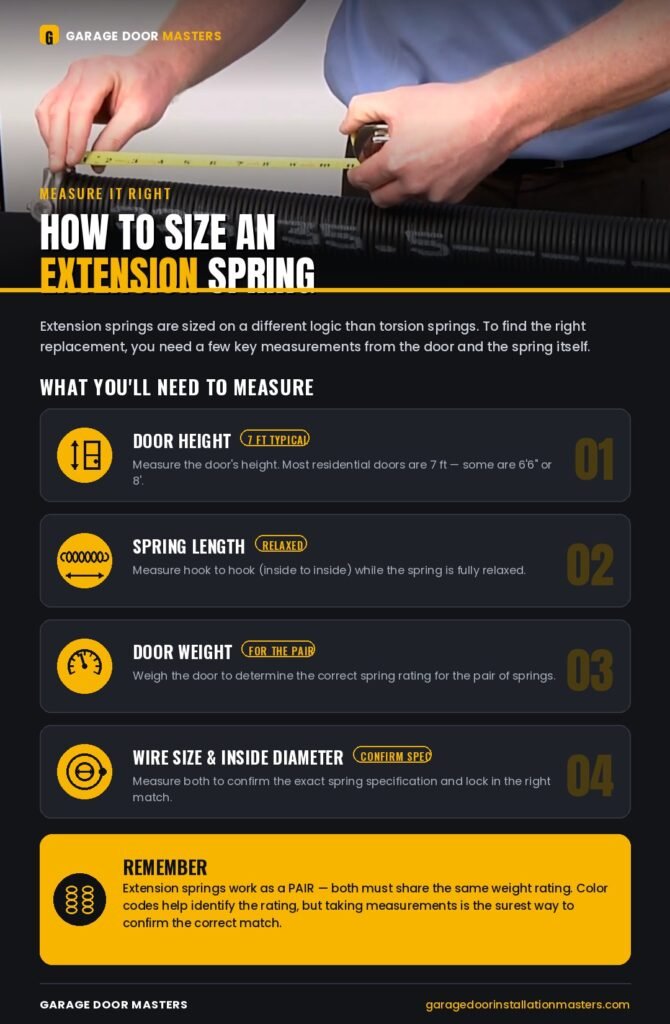
Extension springs are sized on a different logic.
Extension springs are sized differently from torsion springs. To find the correct replacement, you need a few key measurements from the door and the spring itself.
You’ll need:
Door height
Measure the height of the garage door. Most residential doors are 7 feet tall, but some are 6’6″ or 8′.
Spring length
Measure the spring from the inside of one hook to the inside of the other while the spring is relaxed.
Door weight
Weigh the door to determine the correct spring rating for the pair.
Wire size and inside diameter
Measure these if you need to confirm the exact spring specifications.
Remember:Extension springs work as a pair, so both springs should have the same weight rating. The color code can also help identify the spring rating, but measurements are the best way to confirm the correct match.
Understanding the DASMA Color Code
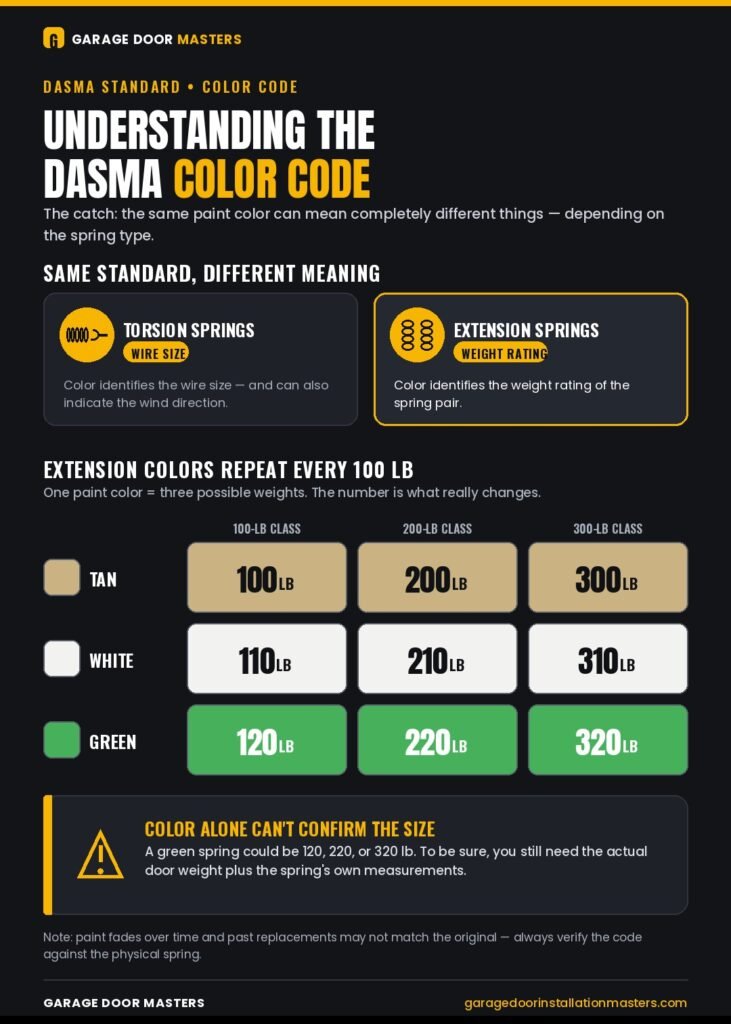
Here’s a detail that catches many DIYers:The extension spring color code follows the DASMA standard but the color means different things depending on the spring type.
For torsion springs, the painted color identifies the wire size and may also indicate the wind direction.
For extension springs, the color identifies the weight rating of the spring pair. The important detail is that extension spring colors repeat every 100 pounds. For example:
- Tan: 100 lb (also used for 200 lb and 300 lb ratings)
- White: 110 lb (also used for 210 lb and 310 lb ratings)
- Green: 120 lb (also used for 220 lb and 320 lb ratings)
So a green extension spring does not always mean the same door weight. Color alone cannot confirm the correct spring size — you also need the actual door weight and spring measurements.
DASMA color codes are a helpful starting point, but always verify them against the physical spring details because paint can fade and previous replacements may not match the original setup.
How to Weigh Your Garage Door
Door weight is an important part of extension spring sizing and can also help confirm your spring setup. A simple bathroom scale can help you get an estimate.
- Disconnect the opener. Pull the emergency-release cord (the red handle hanging from the opener rail) so the door can move by hand. Keep the door fully closed while doing this.
- Place a bathroom scale under the center of the door.
- Carefully lift the door slightly until the bottom edge rests on the scale and the weight transfers onto it. Keep the door steady while reading.
- Record the weight. Knowing the door weight makes it easier to use a garage door spring weight chart when confirming the correct extension spring.
Do not force the door upward if it feels extremely heavy or difficult to move!
Tools You’ll Need to Measure
You don’t need much to size a spring correctly:
- A tape measure or steel ruler (marked in 1/16″ increments)
- A bathroom scale for weighing the door
- A flashlight to read faded cone stamps and colors
- A notepad or your phone to record all the numbers
- Gloves — springs are often rusty and sharp
Notice what is not needed: you do not need winding bars or tools to adjust the spring cones. Measuring only requires basic tools to record the spring size. That is the key difference — finding the right spring is a measurement task, not a garage door spring replacement job.
Common Sizing Mistakes to Avoid
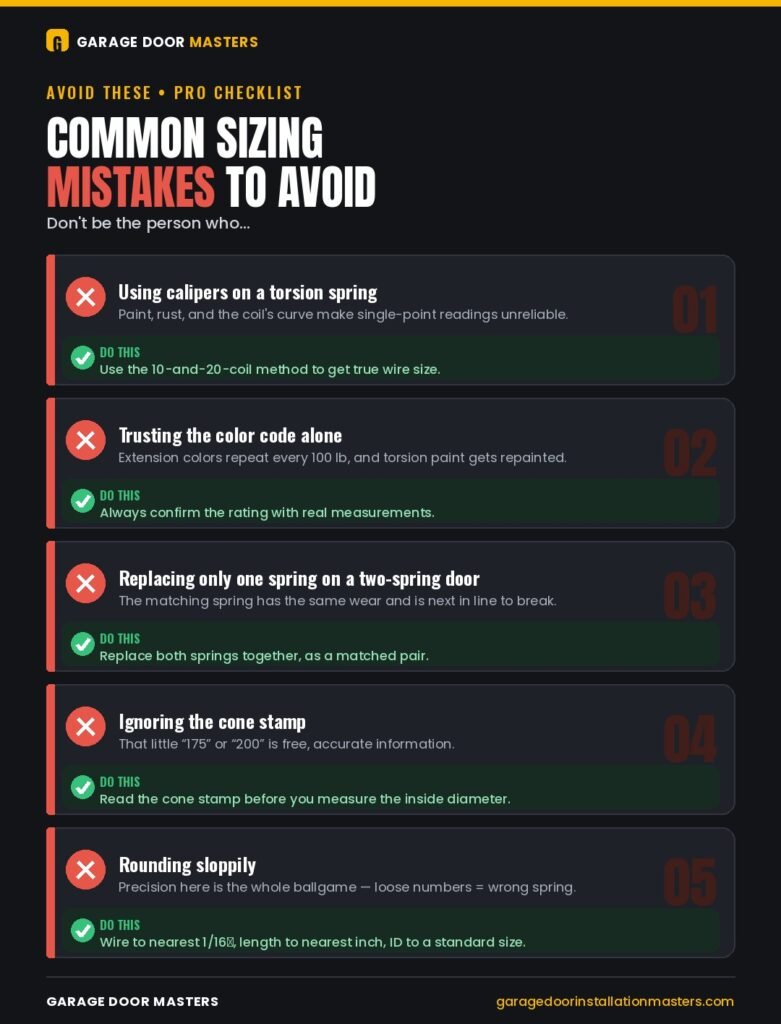
A few errors show up again and again. Don’t be the person who:
- Uses calipers on a torsion spring. Paint, rust, and curve make single-point readings unreliable. Always use the 10-and-20-coil method.
- Trust the color code alone. On extension springs the colors repeat every 100 lbs. On torsion springs paint gets repainted. Always verify with measurements.
- Replaces only one spring on a two-spring door. The other is next in line to break.
- Ignore the cone stamp. That little “175” or “200” is free, accurate information — read it before you measure the ID.
- Rounds sloppily. Wire size to the nearest 1/16″, length to the nearest inch, ID to a standard size. Precision here is the whole ballgame.
Should You Consider a Higher Cycle-Life Spring?
While choosing a replacement spring, it is worth thinking about how long you want it to last. Springs are rated by cycles, meaning one complete opening and closing of the garage door.
A standard garage door spring is usually rated for about 10,000 cycles. With an average of three to four door uses per day, that comes out to roughly seven years of service.
If your garage door gets heavy daily use — multiple vehicles, frequent deliveries, or a busy household — a standard spring may wear out sooner.
Higher-cycle springs are available in 20,000, 30,000, or even 80,000 cycles. They are built to handle more use and can last much longer before needing replacement.
The spring size still depends on your door and measurements. A higher-cycle spring simply gives you a longer-lasting option.
A Quick Word on Safety (Read This)
Measuring a spring is safe. Replacing one is not.
A wound torsion spring stores enormous energy — often 150 to 300 pounds of force, held in a coil the size of your forearm. Releasing or winding that tension incorrectly can break bones, shatter teeth, or worse. It requires proper winding bars — never screwdrivers, never pliers, never “whatever’s in the drawer.” People are seriously injured every year attempting this.
Sizing and measuring are safe, do it yourself. Winding a spring under tension is a complicated job, leave it to a pro. That is why this guide only covers measuring the spring, not replacing it. Once you have your numbers, the smart move is to hand them to someone who does professional garage door spring replacement every day, with the right tools and expertise..
Sized Your Spring? Let a Pro Finish the Job
You’ve got the measurements — now let our team handle the replacement safely. Garage Door Installation Masters provides same-day garage door spring repair in Minneapolis and nearby areas, including Plymouth, Minnetonka, Apple Valley, and Houston.
Bring us your spring details, and we’ll match the right replacement. Ask about high-cycle spring upgrades for longer-lasting performance.
Get your free estimate today.