If you are asking “should both garage door sensors be green?”, the answer is no. On many garage door openers, one sensor is green and the other is amber or yellow. What matters is that both sensors have power, are aligned, and allow the door to close normally.
If your garage door will not close, one sensor light is blinking, or a sensor is off, Garage Door Masters can inspect and repair it in Minneapolis with same-day service.
Is Your Garage Door Acting Up? The Sensor Lights Can Tell You Why.
If your garage door reverses or refuses to close, check the sensor lights first. A solid light usually means the sensors are working. A blinking light, no light, or an unusual color often points to an alignment, wiring, or power issue.
What Do Garage Door Sensor Lights Mean?
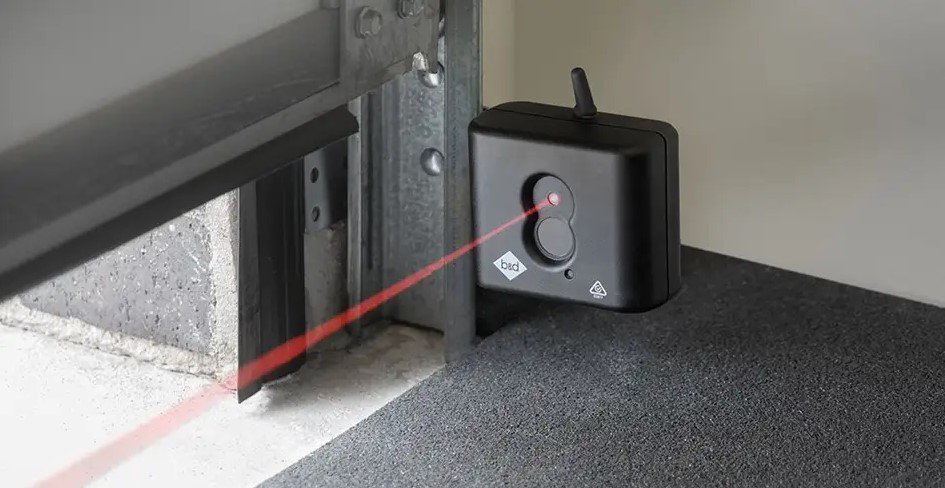
Garage door sensor lights show whether the safety sensors are powered and communicating correctly. The exact colors can vary by brand, but the purpose is the same: they tell you if the beam is clear.
Most garage doors use two photo-eye sensors near the bottom of the tracks. One sends the beam, and the other receives it. If the beam is blocked or the sensors are out of alignment, the opener will stop the door from closing.
Here’s what the most common sensor light conditions indicate:
| Sensor Light | What It Usually Means |
| Solid Green | The receiving sensor is aligned and detecting the beam. |
| Solid Amber or Yellow | The sending sensor has power and is transmitting normally. |
| Blinking Green | The sensors are misaligned or the beam is interrupted. |
| No Light | The sensor may have lost power, has damaged wiring, or has failed. |
| Red Light (on some models) | Some brands use red to show a fault or diagnostic issue. Check your opener manual. |
Should Both Garage Door Sensors Be Green?
No. On many garage door openers, it is normal for the two sensors to show different colors.
For example, LiftMaster, Chamberlain, and Craftsman often use:
- Amber or yellow for the sending sensor
- Green for the receiving sensor
A steady yellow light usually means the sending sensor is working. A steady green light usually means the receiving sensor is aligned and detecting the beam. If both lights are steady and the door closes properly, the system is usually fine.
Some brands, like Genie, use different colors or flash patterns, so always check the opener model before assuming there is a problem.
Common Sensor Light Colors by Garage Door Opener Brand
| Garage Door Opener Brand | Typical Sensor Light Colors |
| LiftMaster | Amber sending sensor + solid green receiving sensor |
| Chamberlain | Amber sending sensor + solid green receiving sensor |
| Craftsman | Amber sending sensor + solid green receiving sensor |
| Genie | Colors and flash patterns vary by model |
| Linear & Other Brands | May use different color combinations or indicators |
If your lights do not match the normal pattern for your opener, or one light suddenly changes, blinks, or turns off, the next step is to identify what that specific light means.
Green, Yellow & Red Garage Door Lights Meaning
Not every garage door sensor light points to the same problem. In fact, the color and behavior of the LED can often tell you where to begin troubleshooting before you touch a single wire or replace any parts.
Use the table below as a quick reference.
| Sensor Light | What It Means | What You Should Do |
| Solid Green | The receiving sensor is properly aligned and detecting the beam. | No action is needed if the garage door operates normally. |
| Solid Yellow or Amber | The sending sensor has power and is transmitting the beam. | This is normal on many opener brands. |
| Blinking Green | The receiving sensor cannot detect the beam consistently. | Check for misalignment or anything blocking the beam. |
| Blinking Yellow | Less common, but may indicate unstable power or a wiring issue on certain models. | Inspect the wiring and sensor connections. |
| No Light | The sensor is not receiving power or has failed. | Check the wiring, opener power, and sensor condition. |
| Red Light | Some garage door openers use red to indicate a fault or communication problem. | Refer to your opener’s manual or have the system inspected. |
Instead of focusing only on the color, pay attention to whether the light is solid, blinking, or completely off. A steady light usually indicates normal operation, while blinking or no light often points to a problem that needs attention.
Why Is One Garage Door Sensor Yellow?
If one garage door sensor is yellow, do not assume it is broken.
On many systems, the yellow or amber light belongs to the sending sensor, which simply means it has power and is transmitting the infrared beam across the garage door opening. If the receiving sensor is showing a solid green light at the same time, your sensors are likely working exactly as intended.
The yellow light only becomes a concern when the receiving sensor fails to detect the beam or the garage door refuses to close.
If that happens, check these common causes before replacing the sensor.
The Sensors Are No Longer Aligned
Garage door sensors sit only a few inches above the floor, making them easy to bump with garbage bins, bicycles, lawn equipment, or storage boxes. Even a slight movement can shift the beam enough to prevent the receiving sensor from recognizing it.
If the brackets appear crooked or the receiving light is blinking, gently realign both sensors until the indicator remains solid.
Dirt or Debris Is Covering the Lens
Dust, cobwebs, pet hair, and road grime gradually collect on the sensor lenses. While the buildup may seem minor, it can weaken the infrared beam and create intermittent problems.
Clean both lenses with a soft microfiber cloth. Avoid abrasive cleaners that could scratch the plastic cover.
Something Is Blocking the Beam
The obstruction is not always obvious.
Children’s toys, snow shovels, garden tools, extension cords, or even a pile of leaves can interrupt the beam long enough to stop the garage door from closing.
Before looking for electrical problems, make sure the entire area between the sensors is completely clear.
The Wiring Has Been Damaged
If the yellow light stays on but the receiving sensor has no light at all, inspect the low-voltage wires running from each sensor back to the opener.
Look for loose wire nuts, damaged insulation, rodent damage, or wires pulled loose during recent work inside the garage.
Electrical issues are often hidden behind finished walls, so visible wiring is only part of the inspection.
Moisture or Weather Exposure
Minneapolis weather can create sensor problems that are not common in warmer climates.
Heavy snow, melting ice, freezing temperatures, and moisture around the sensor brackets can temporarily affect alignment or electrical connections. Seasonal expansion and contraction may also loosen mounting hardware over time.
If the issue only appears during winter or after heavy rain, weather-related movement may be contributing to the problem.
Related Blog: Garage Door Locks: Types, Installation, Security & Maintenance Guide
Why Won’t My Garage Door Close Even When the Sensors Have Power?
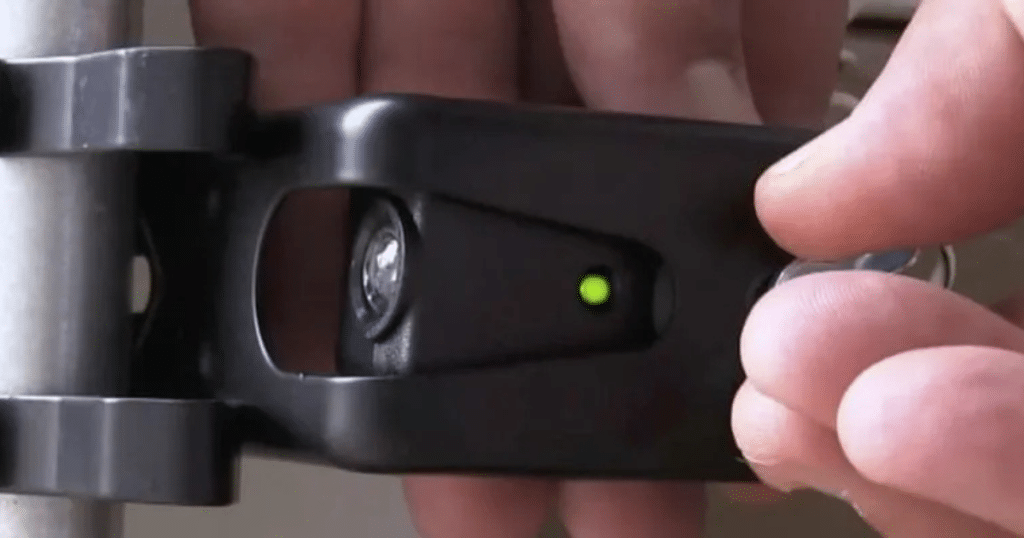
Seeing both sensor lights illuminated does not always mean the entire safety system is working correctly.
Your garage door may still refuse to close if the opener detects another condition that could affect safe operation.
Here are several possibilities worth checking.
The Receiving Sensor is not Seeing a Stable Beam
A solid yellow light on the sending sensor does not guarantee the receiving sensor is consistently detecting the beam.
If the green light flickers when the door vibrates or when someone walks past the sensors, the alignment may still be slightly off. Small adjustments often restore a stable connection.
The Garage Door Opener Has Detected Another Safety Issue
Modern garage door openers monitor more than just the photo-eye sensors.
Travel limits, excessive closing force, worn internal gears, or logic board faults can also prevent the door from closing properly, even when both sensors appear normal.
If the opener’s diagnostic light is flashing or displaying an error code, the problem may extend beyond the sensors themselves.
Damaged Tracks or Rollers Are Interrupting Door Movement
Sometimes the sensors are functioning perfectly, but the garage door binds while closing.
Bent tracks, worn rollers, broken hinges, or debris inside the track can create resistance that causes the opener to reverse as a safety precaution.
If the door hesitates at the same location every time, inspect the door’s travel path rather than the sensors alone.
The Opener Needs Professional Diagnosis
Once you’ve confirmed the sensors are clean, aligned, and receiving power, continuing to reset the opener or repeatedly forcing the door closed usually won’t solve the problem.
At that point, a complete system inspection can identify whether the issue involves the sensors, wiring, opener, door hardware, or another safety component.
At Garage Door Masters, our technicians diagnose the entire garage door system, not just the sensor lights, so you receive the right repair the first time instead of replacing parts that are still working properly.
How to Fix Garage Door Sensor Lights: A Step-by-Step Troubleshooting Guide
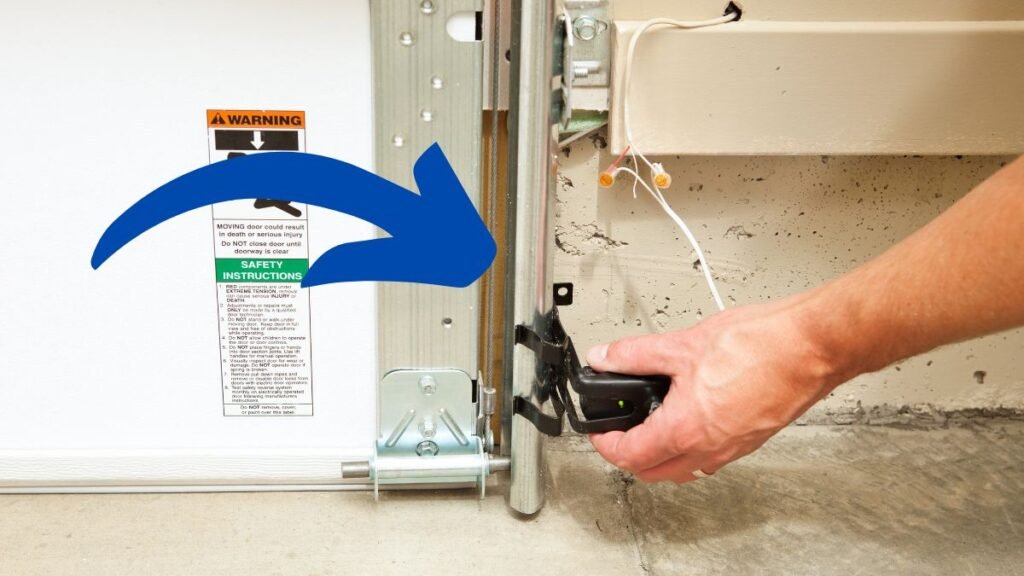
Before replacing a garage door sensor or scheduling a repair, it is worth checking a few common issues that homeowners can safely inspect themselves. These steps require only a few minutes and often resolve minor sensor problems without replacing any parts.
If the garage door still won’t close after completing these checks, the issue may involve damaged wiring, a failed sensor, or the garage door opener itself.
Step 1: Make Sure Nothing Is Blocking the Sensors
Start by checking the space between both sensors. Even a small object crossing the infrared beam can prevent the garage door from closing.
Look for:
- Storage bins or tools
- Children’s toys
- Pet bowls
- Yard equipment
- Snow or ice buildup
- Loose extension cords
Once the opening is completely clear, test the garage door again.
Step 2: Clean Both Sensor Lenses
Garage door sensors sit close to the floor, where dust, dirt, and moisture build up over time.
Use a clean microfiber cloth to gently wipe each sensor lens. Avoid spraying cleaners directly onto the sensors, as excess moisture can affect the electrical components.
Cleaning the lenses is one of the quickest maintenance steps and often restores reliable operation if visibility has been reduced.
Step 3: Check Sensor Alignment
Both sensors should face each other directly across the garage door opening.
If one bracket has shifted, loosen the mounting hardware slightly, adjust the sensor until the indicator light becomes steady, then tighten it securely.
Avoid forcing the bracket into position, as bent brackets usually require replacement rather than additional pressure.
Step 4: Inspect the Wiring
Follow the low-voltage wires from each sensor back toward the opener.
Check for:
- Loose wire connections
- Cracked insulation
- Pinched wires
- Corrosion
- Rodent damage
Visible wiring damage should be repaired before the garage door is operated again.
Step 5: Test the Garage Door
After completing the previous steps, close the garage door using the wall control.
Watch for any unusual behavior, including:
- The door reversing before it reaches the floor
- Flashing opener lights
- Clicking sounds without movement
- Inconsistent closing
If any of these symptoms remain, the problem is likely beyond basic maintenance.
Step 6: Schedule a Professional Inspection
If the sensors still are not working correctly, further troubleshooting usually requires electrical testing and opener diagnostics.
Rather than replacing parts one at a time, a complete inspection identifies the actual cause of the problem and helps prevent unnecessary repair costs.
At Garage Door Masters, our technicians inspect the entire garage door system, including the sensors, wiring, opener, tracks, rollers, and safety features, to ensure the correct repair is completed on the first visit.
DIY or Professional Garage Door Sensor Repair?
Not every sensor issue requires a technician, but not every problem can be safely solved with basic troubleshooting either.
Use this guide to determine when a DIY fix is appropriate and when professional service is the better option.
| Situation | DIY | Professional Service |
| Cleaning dirty sensor lenses | ✓ | |
| Removing an object blocking the beam | ✓ | |
| Minor sensor alignment | ✓ | |
| Tightening a loose mounting bracket | ✓ | |
| Damaged sensor wiring | ✓ | |
| Replacing a failed safety sensor | ✓ | |
| Garage door opener electrical problems | ✓ | |
| Logic board or circuit issues | ✓ | |
| Intermittent sensor failures | ✓ |
A good rule of thumb is simple: if the problem involves cleaning, alignment, or removing an obstruction, most homeowners can handle it safely. If the issue involves electrical components, replacement parts, or inconsistent system behavior, professional diagnosis is usually the faster and more reliable solution.
Garage Door Sensor Repair in Minneapolis, MN
In many cases, garage door sensor problems turn out to be much simpler than homeowners expect. A dirty lens, a loose bracket, or a sensor that has been bumped out of alignment can often be corrected without replacing the entire system.
The real challenge is knowing when further troubleshooting is unlikely to help.
If the lenses have already been cleaned, obstructions checked, alignment confirmed, and the garage door still won’t close consistently, it usually means the issue goes deeper than routine maintenance. Hidden wiring damage, failing safety sensors, or opener-related faults can create the same symptoms, which makes them difficult to identify without proper testing equipment.
One mistake homeowners often make is replacing parts based on guesswork. A new sensor won’t solve the problem if the real issue is a damaged wire inside the wall or a failing opener logic board. In many cases, that only adds unnecessary expense while the original problem remains.
That is why, at Garage Door Installation Masters, they start with a complete system inspection rather than immediately recommending replacement parts. Their goal is to identify the actual cause of the problem so only the repair that is truly needed gets done.
If you are in Minneapolis and your garage door sensor lights still do not look right after following the steps in this guide, they can help get your door operating safely again.
Why Homeowners Trust Garage Door Installation Masters
Garage door sensor problems can look almost identical, even when the underlying cause is completely different. A blinking green light, a door that reverses halfway down, or a sensor that randomly stops working can each point to several different issues.
Over the years, they have found that the most effective repairs begin with careful diagnosis, not assumptions.
That is why their approach is simple. They inspect the entire garage door system, explain what they find in plain language, and recommend only the repairs that will solve the problem. If it is a quick sensor adjustment, they will say so. If a component has reached the end of its service life, they will explain why and discuss the available options before any work begins.
Their goal is not just to get the garage door closed again. It is to make sure the safety system works exactly as it was designed, giving homeowners confidence every time they use the garage door.
Whether the repair turns out to be minor or more involved, homeowners will know exactly what caused the issue, what was repaired, and how to help prevent the same problem in the future.